King Regula IIb Camera Servicing
The Camera
I came across this camera by coincidence. I bought a small lot of cameras where this one was totally insignificant, until I closely looked at the lens. It's Gethaldus Zagreb Ghenar. The fact that was attractive to me was that it was apparently made in Yugoslavia. Or not?
There can be little found on the internet about this simple machine, however, the company whose name the lens wears still exists in Zagreb, Croatia. It is in a prescription glasses business and one can find information that some other fractions of the once united optical company exist as well. They actually have a lens production facilities so it is possible that the lens isn't just rebadged.
Former Yugoslavia's import duties were very high to encourage domestic production. However, the fact was turned into profit by some firms with importing partly assembled goods and finishing them inside the country. Ghetaldus may have establish that kind of business deal with West German camera manufacturer Regula-Werk King KG that made the camera line named Regula. To which extent the camera was actually made in Yugoslavia is unfortunately unknown to me. On the bottom of the camera it is actually written "Made in Germany".
The Specifications
Regula IIb (or 2b) is a fairly simple viewfinder camera with a Pronto shutter. There is no rangefinder or light meter present. However, the viewfinder is relatively large and bright. The exact production date is unknown to me, but the German Regulas with similar design were produced during 1950s. Actually Regula III line is more similar to IIa than the II line. Yugoslavian Regulas may have been produced later since production may have been moved from Germany like it was done with the Altix made in Sarajevo by the company Zrak. Other specs are as follows:
- Ghetaldus-Zagreb GHENAR lens 45 mm F/3.5
- 3 elements in 3 groups
- Single coated
- Focus 0.9 m to infinity
- Minimum aperture F/16
- 10 aperture blades
- PRONTO central leaf shutter 1/25 - 1/200 s + B
- Self timer
- Flash sync
- Auto cocking during film advance
- Double exposure prevention
- Deducting frame counter
Despite it may look cheap (well, it actually was an entry level camera) it gives a solid feel since it is made mostly out of metal and quiet heavy.

The Problems
Well, it was stuck with self timer set and not moving. I don't have plans on using Regula extensively in the future nor am I delusional about it's performance, value or rarity (despite the fact that its production was localized for sure and thus somehow rare). However, it appeared to me as a nice project that can go wrong without significant loss. And I like to have working cameras in my collection.
On the other hand, Pronto shutters can be found on many other cameras so this information may be usable also for non Regula IIb camera owners.
The Service
For the tools I use you can refer to the
Horizont Camera Servicing blog post. Fortunately nothing special was needed for the Regula.
Set the lens to infinity and unscrew the three little screws that can be found on the focusing portion of the lens. The screws are very small and just hold the element in place. There are no threaded holes beneath them since this enables infinity calibration when putting the camera back together.
Unscrew the four screws that hold the metal rim with the engraved shutter speeds and F numbers. It's just a decorative metal plate and removing it is not necessary, but it is easier to clean the lens if removed.
With the focusing rim removed, the front lens element assembly can be freely unscrewed. I suggest you mark the current position and count how many turns are needed to unscrew it entirely.
Beneath is the second lens element that needs to be unscrewed with a spanner wrench.
Once removed the shutter blades shine in all their glory. I was surprised how clean they were and afraid at the same time since it looked like the dirt is not a reason for this shutter malfunction.
The depth of field scale rim can now be freely removed.
At this point I changed her position and started working from behind. There are four screws in the film compartment that hold the metal parts in shape of sleds.
When unscrewed, the sleds can be removed...
... as well as the film plane part that exposes the inner guts of the Regula. Note the cuts in the film plane - they causes an interesting effect on the photo edges.
A film advance mechanism and shutter cocking gears are clearly visible, but our next goal is to remove the third lens element. A spanner wrench is needed again.
In my case, it was very dirty. As you can see there is no need to remove the lens element from the assembly so be careful which nut you attack with your wrench.
Despite the fact that the aperture blades are in a fully open position, the opening is rather small. This shows that the shutter and aperture can fit a much brighter lens than 45 mm F/3.5. And actually once the shutter assembly is removed from the camera body, the aperture can be opened further. To get the assembly out, the ring screw should be removed.
The shutter assembly slides out easily. Our next target is a pin that is stuck into the shutter cocking shaft. I used pliers to get it out. It may go out in one direction easier. Be careful not to bend the shaft. It's best to search for pliers support on the shaft as well. And one other thing - the pin was literally shot out like a bullet in my case and by some freak coincidence it bounced from my forehead and was caught in metal fruit bowl 1.5 m away.
The camera looks very sad without its shutter assembly. On the right
there is the shutter cocking and and on the left the shutter release coupling.
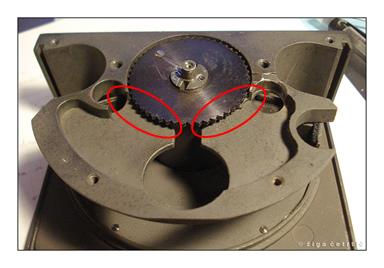
The aperture should be now opened to the position where 3 screws are revealed. But be careful since they are not all of the same length. The third one is longer (on the picture on the left). The aperture rim should be turned further to reveal an additional screw that is the same length as the first two.
And here are the shutter blades. I didn't disassemble the aperture block with my first Regula IIb since there was no need to do that. I only cleaned it from the outside to make sure that no grease would eventually flow to the shutter blades. However, with the second Regula I came across by, the aperture needed disassembly since one leaf fell out of its nesting. But putting it back together was a nerve wrecking procedure.
Here are aperture blades in a company of shutter blades. Notice that there are 7 aperture blades without and 3 with cuts on one side. I have no idea why.
To put the blades back in order, it took many tries. Initial plan was to learn the best procedure and after that repeat it and take photos for the blog. However, once the blades were put back together, I wasn't willing to break them apart again. Instead I wish you good luck and calm hands if you will have to dig into the aperture assembly :) On the photo above I'm not even half way there since the aperture ring with the blades needs to be put in the assembly which is very tricky.
Back to the shutter assembly - I figured out that the shutter moves freely but doesn't stay cocked. Don't be confused by the electrical resistor. It just played a role of a shutter cocking shaft.
Well, I was impressed by the shapes of the aperture blades and this one is dedicated to the former Yugoslavia :)
The shutter blades can be removed without unscrewing the screws that are shown unscrewed here. I screwed that. No harm was done, however. It's now easy to clean the blades if needed.
Turn the assembly around. Notice the oddly shaved off screw. Turn it a bit so that the metal rim can travel past it and unscrew the rim.
Here is a detailed view of the shaved screw that holds the metal rim in
position once screwed.
Once the metal plate is removed, the speed selector rim is revealed. On the top part of the image there is a cut off with four steps visible that moves a little shaft up and down and selects the shutter speed with the help of a simple delay mechanism. The long cut off on the left serves as a B shutter selector since it allows longer travel of the shaft that stops the shutter closing until the shutter lever isn't released. When B speed is selected, delay mechanism is actually set at 1/25 s.
Notice the steps cut into the speed selector rim and the
small shaft traveling inside it.
When I opened the second Regula IIb I realized that in the first one one part is missing - the shaft visible on above photo. It blocks the use of the self timer when B shutter speed is selected. If it is absent, the B setting with self timer operates like a 1/25 s was selected. This shaft is not held in its place and may fell out of the mechanism during camera disassembly.
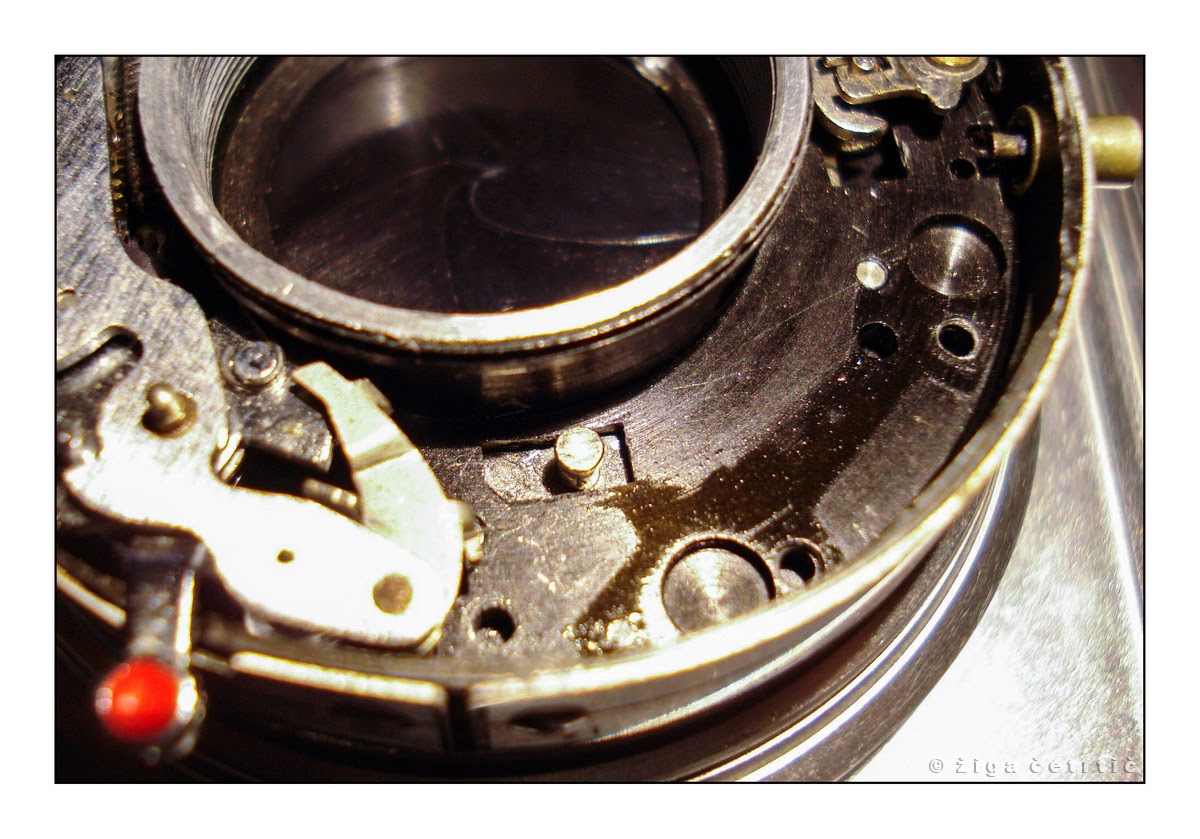
Remove the rim and admire the Pronto shutter all naked.
These are the main parts of the mechanism as far as my knowledge goes:
- a) Shutter release lever
- b) Self timer power spring
- c) Self timer mechanism block
- d) Self timer lever
- e) Shutter delay mechanism block
- f) Shutter speed selector shaft
- g) Delay mechanism trigger
- h) Shutter cocking shaft
- i) Rusted trigger shaft that was stuck
And there is my problem - one rusty part. It's underneath its shiny brothers and sisters, but man it is ugly. Interestingly, only one part was evidently made out of other (or lower quality) material and thus got rusty and stuck the whole mechanism. Solution was quick and dirty - WD40.
Once the mysterious cocktail made its job, I started jiggling the parts and found that the self timer was partially stuck as well. Further jiggling helped the WD40 protrude deeper and release it. One shaft at the shutter delay mechanism was out of its place - I guess it was forced out once the shutter was stuck - so it needed to be unscrewed and positioned correctly. There were three small springs misplaced but unfortunately I found the correct positions for only two of them. The third one, shown above, stayed unsolved.
With help of
Chris Sherlock's document I discovered the reason for the misplaced third spring. The longer of the four screws that holds the aperture assembly protrudes to the shutter mechanism and supports this spring. To get it back in place, back part of the shutter assembly should be put back together.
When putting the shutter back together, one of the leafs stays at the top of the others. It is not interleaved as is common with aperture blades. Once the aperture assembly is screwed on, the little spring can be put in its place.
Here the protruding screw is visible on the left from the big screw around which the wire spring should be wound.
To set the spring the shutter delay mechanism needs to be removed. It is held in it's place by two different screws. One is visible only when the shutter is cocked.
The other side of the spring should be hooked to the shaft of the shutter blades' ring. On the above image spring holding screw is removed. The little spring helps with closing the shutter, but my camera seemed to work fine even without it.
Other steps of putting the camera together are reversal to getting it apart. Don't screw the shutter assembly covers too tight since the B shutter setting may not work in that case and the shutter speed selector may be stiff.
Be careful not to mess or, even better, check the infinity setting with the ground glass just before mounting the focusing knob on the front lens element assembly.
The Result
And here are some photos taken with the repaired Regula IIb. I find the zig-zag pattern of the picture edges very appealing. They may be a kind of signature of this camera since I haven't seen them elsewhere. The cause is the shape of the light shaft in the film chamber.
Overall the camera now purrs like a kitty, clicks like a mouse and looks very well.
For the end just a little disclaimer:
I'm an enthusiast collector of vintage cameras that likes to use them
and tries not to spend a lot of money for his hobby. I'm not educated
in camera servicing and I have little experience. So if someone that
reads this has any comment or suggestion about what I did (wrong) or I
should do, please, write a comment.